There comes a time in (pretty much) every flight-simmer’s career when they install a really great new aircraft into their software, only to find that it doesn’t have a GPS capability.
Of course, those of us who enjoy flying older aircraft will know that GPS wasn’t around when these particular aircraft were gracing our skies. However, with modern GPS systems being so compact and able to attach to any smooth, flat surface, it doesn’t take much to add one into our navigation systems.
Luckily, it’s almost as easy to attach one to our virtual cockpits in the flying sim world and this post will go through the process and explain what needs to be added in order to facilitate your aircraft with a fully working GPS.
Stage 1
First things first, we’re going to need to locate a file called panel.cfg for the aircraft we wish to add our GPS panel to. This can ordinarily be found at:
C:\Program Files (x86)\Microsoft Games\Flight Simulator X\Sim Objects\Airplanes\“AIRCRAFT”\panel\
or for Steam Edition users
C:\Program Files (x86)\Steam\Steam Apps\common\FSX\SimObjects\Airplanes\“AIRCRAFT”\panel\
Where “AIRCRAFT” is the folder name of the aircraft you wish to edit.
Alternatively, if it’s a helicopter you’re wishing to perform the mod on, then look in
…\Sim Objects\Rotorcraft\“AIRCRAFT”\panel\
Stage 2
Make a backup of your panel.cfg file before making any edits, just in case an error occurs. I perform these backups by making a folder in the aircraft folder called “backup” and dropping a copy of the original cfg file into it, but you can do it in any way that you like.
NOTE: I will accept no liability for any damge caused by following this guide – So BACK IT UP FIRST!
Stage 3
Ok, so now that we’ve found our panel.cfg file for the aircraft we wish to mod (And we’ve backed it up), we’re going to need to edit it to include the additional information for our GPS panel.
Right click the panel.cfg file and choose edit (note: Depending on how your PC is set up, you may need to perform this step as an administrator), this should open the file in the Windows notepad app.
At the top of the file, you should see a few lines of text laid out in a similar fashion to below:
[Window Titles]
Window00=RADIOS
Window01=Control Windows
Window02=INFO
Underneath the last entry, we’re going to add the following line: WindowXX=GPS (where XX is the next number in sequence). So in the example above, my amended entry should now read:
[Window Titles]
Window00=RADIOS
Window01=Control Windows
Window02=INFO
Window03=GPS
Stage 4
Underneath the entries above, you should have a set of entries that start with [Window00]. These contain the specific information relating to the windows identified in the entry we edited in Stage 3.
Work your way down to the last [WindowXX] entry (in my case, [Window02]). Underneath this last entry, we’re going to add the necessary information for our GPS window.
As you’ll most likely be aware, there are two versions of the GPS in FSX; the 295 and the 500. I’ll show you how to add both versions so that you can choose your own flavour of navigation. Note: Only add ONE of these to your cfg file!
For the GPS Map 295, place the following entry underneath the last [WindowXX] entry:
[WindowXX]
Background_color=0,0,0
size_mm=545,354
position=8
visible=0
ident=GPS_PANEL
window_size= 0.500, 0.362
window_pos= 0.000, 0.000gauge00=fs9gps!gps_295, 0,0
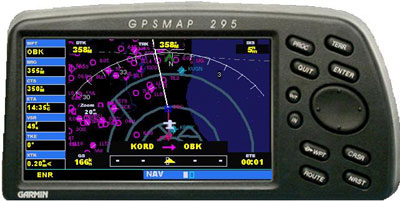 |
| Garmin GPSMAP 295 |
Or for the 500, add this:
[WindowXX]
Background_color=0,0,0
size_mm=545,354
position=8
visible=0
ident=GPS_PANEL
window_size= 0.500, 0.362
window_pos= 0.000, 0.000gauge00=fs9gps!gps_500, 0,0
 |
| Garmin GPS 500 |
Make sure that you change [WindowXX] to the next sequential number, so that it matches the number you placed in the [WindowTitles] section!
And that, my friends, is it. Save the file, load up FSX and you should now have a way to navigate those skies. In order to get the panel up, simply press [Shift+XX] where XX is the number of the panel.
