Computer Input/Output Devices

An introduction to some of the more common input/output devices

Some computer devices are able to function as both input and output devices. This article will look at some of the more common devices and their uses.

MIDI-Enabled Devices

A MIDI (Musical Instrument Digital Interface) connection makes it possible to connect a range of musical instruments or devices, including electric keyboards, synthesizers, guitars and mixers, to a computer system. Often, computer sound cards will also include a built-in synthesizer as well, making it possible for them to produce MIDI sounds. It’s also possible to connect MIDI devices to each other, before connecting them to a computer system.

MIDI devices can be connected to a computer system through a variety of ports, depending upon the manufacturers design. MIDI to USB Interface, MIDI to Serial and MIDI to Firewire connections are the most commonly used and allow faster communication between the musical instrument and the computer or controller device.

An example MIDI Device
Multi-Function Printers

Multi-function printers combine both input and output features into one device and the vast majority of printers available on today’s market make use of these features. This enables users to save valuable office space. Typically, multi-function printers include some or all of the following features:

  • Printer (output)
  • Scanner (input)
  • Fax (both input and output)
Multi-Function Printer
Headsets

A headset combines both headphones (audio output) and a microphone (audio input). Headsets can be used to take part in online meetings, online gaming with other players and to use with applications such as Skype.
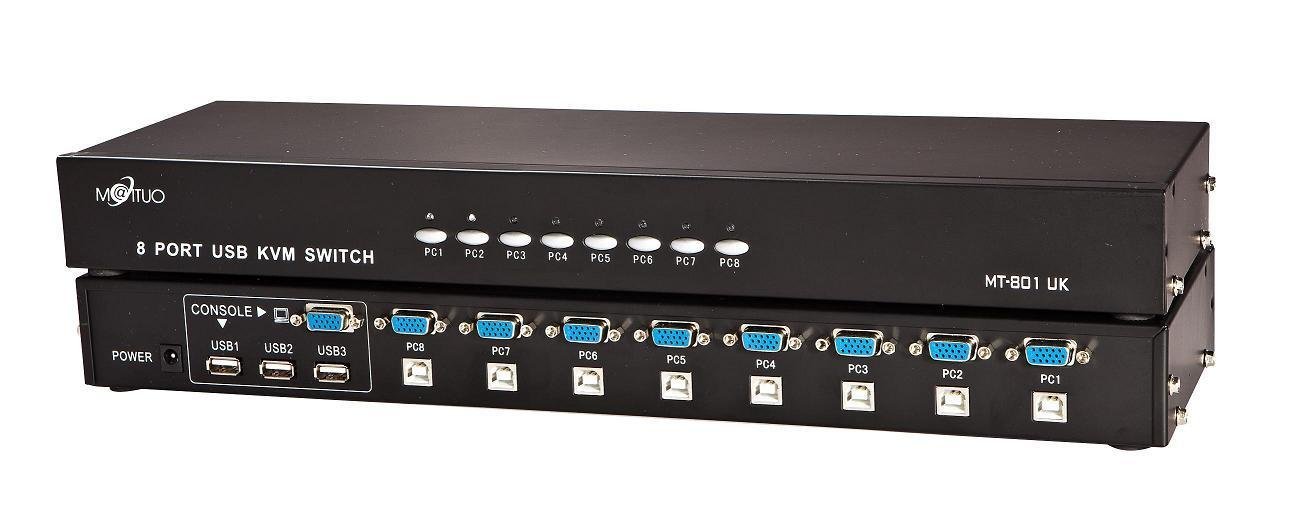
KVM Switches

Keyboard, video & mouse (KVM) switches are devices that enable a user to control multiple computer systems with a single keyboard and mouse, each of which sending their display to a single monitor. This setup is particularly useful when managing test environments or accessing multiple servers that have no requirement for a dedicated set of input devices or display.

KVM switches mostly use USB or PS/2 connections and generally come in desktop, inline or rack mount versions. Some of the higher end rack mount KVM switches can be uplinked so that they can be connected to dozens of computer systems.

An 8-port KVM Switch
Touch Screens

Touch screens are perhaps one of the most common types of input/output device in today’s technological world, being used in mobile devices and laptops, point-of-sale terminals in fast food restaurants and some ATMs.

Touch screens are commonly controlled simply by the user touching the screen with their fingers, but there are some which make use of a stylus to perform the same tasks.

Touch screens are comprised of three ‘parts’ in order for them to function correctly:

  • Touch Sensors: The touch screen sensors are typically either a panel that lays over a standard display device or can be built into the monitor itself. In terms of the user, operation of both works in the same way.
  • A Controller: if the touch screen is using an overlay panel, the controller connects to the touch panel and then to the computer system port. Typically, these use a COM or USB port, although in certain circumstances the controller may connect to another port, device or drive. In the case of built in touch sensors, the controller is built into the monitor itself and the monitor carries two cables instead of the usual one which connects to the VGA or HDMI port on the system. The second cable attahed to the monitor will normally connect to the COM or USB port, although there are circumstances where it may connect to an alternative.
  • A Device Driver or Specialised Software: This enables the computers operating system to interpret the information sent to it by the touch screen device.
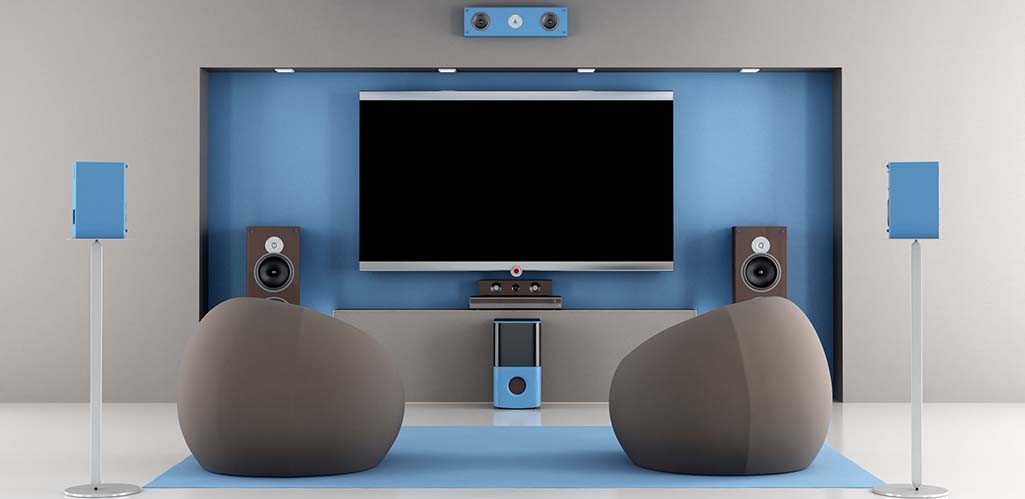
Smart TVs

Smart TVs are classed as hybrid devices. Smart TVs are television sets that have web and internet features built into it, accessible through the use of voice commands or via the remote control. In the vast majority of cases, there is no need to connect other devices to the television in order to perform the functions.

At first glance, this may appear to be a good use of such technology but some devices are not being continually updated as new features from content providers is made available. However, other manufacturers are continuing to provide updates for applications and firmware so that they continue to remain fully functional.

Another potential drawback for some smart TVs is that the voice commands do not have any security measures and are often sent to a third party. This means that there could be no protection for the information that you request. Some manufacturers and providers use the sent information to place additional advertising to your viewing experience. it’s important to consult the documentation that’s packaged with the TV in order to see what the manufacturers TV Privacy Policy is.

Set-Top Boxes

Set-Top Boxes take video content and then convert it into a format that can be viewed on a normal television. They are also known as streaming players or media players.

Traditionally, set-top boxes were utilised by cable television companies to descramble the broadcast signal so that only paying, authorised customers could view the offered television programs. Similarly, satellite television providers also have a set-top box that acts as a ‘descrambler’ for the information which allows over-the-air content to be viewed.

An example Set-top box

it’s also possible to purchase set-top boxes that are not specifically connected to a cable or satellite television provider. Such examples are Apple TV, Amazon Fire TV and Google TV. These devices differ in that they make use of WiFi or Ethernet connections to access the Internet so that content from providers such as Netflix or Hulu can be viewed. Some set-top boxes also include built-in Internet browsers.

In the vast majority of cases, these devices are connected to televisions through coaxial or HDMI connections.

Computer Audio Output Devices: Surround Sound

Computer Audio Output Devices: Setting up Surround Sound Sytems

A fair proportion of home audio systems are setup with some form of surround sound system. ordinarily, these setups are known as either 5.1 or 7.1 surround sound.

5.1 Surround Sound configuration contains one speaker at the front and center, a pair of speakers to the front side of the listener and another pair of speakers to the rear. 5.1 also has a subwoofer that can be placed anywhere in the room, although it’s commonly placed in front, somewhere near the front/center speaker.

A 5.1 Surround Sound Setup

7.1 Surround Sound configuration is very much the same as 5.1, with the exception that there is another set of speakers added to the sides of the listener, somewhere between the front and rear pairs.

A 7.1 Surround Sound Setup

Note: Professional entertainment centers, such as cinemas, often use systems up to and including 16.2 surround sound.

As with home entertainments systems, computer systems can also be connected to more than a single pair of speakers or set of headphones. Some computers even include all of the connections for a 5.1 or 7.1 surround sound system, depending on the included sound card.

Even if the computer doesn’t have the ports required to directly connect a surround sound system, there are a variety of ways that can be used to connect a computer so such a home audio system.

  • Analog Cable: in this method, the computer system is connected to the audio system through an analog cable, with a normal line out jack on one end and a set of RCA connectors on the other. Typically, the jack will connect to the line out or headphone port on the computer, whilst the RCA jacks are connected to a port on the audio receiver, most commonly the auxiliary ports
  • USB Cable: Computers can be connected to an audio receiver through use of a USB cable that has a normal USB connector on one end and a set of RCA plugs on the other. This allows both audio and visual data to be sent to the home audio system. Sometimes, an external digital-to-audio converter (DAC)is connected to the computer via a USB cable and to the home audio system using RCA cables.
  • Digital Audio Cables: Some computer systems come equipped with an S/PDIF port. This port can be used to connect a coaxial cable, with RCA connectors or a TOSLINK cable between the computer and home audio system. Other computer systems, including Mac computers, have a digital port in place of the standard headphone jack. These ports are able to transmit both analog and digital data, depending on which type of device is connected.
  • HDMI: If both the computer system and home audio system have HDMI ports, it’s possible to simply connect the two together through the use of a HDMI cable.

In the majority of cases when connecting a computer to a home audio system, it will be necessary to configure the setup through the computer systems Device Manager (or similar in non-Windows systems).

A Guide to CIT Troubleshooting

Taking a methodical approach to finding problems in a computer system.

It happens to almost anyone who uses computer systems at some time or another. Either a task that we’ve carried out many times before refuses to work, or a new piece of software flat refuses to load.

This article goes through the troubleshooting process, working it’s way towards finding a solution. It’s a general, theoretical, approach rather than an answer sheet, so there’s nothing mentioned that’s too specific.

I’ve attempted to keep this as generalised as I can so that it covers as wide a spectrum of potential troubleshooters as possible.  In the case where there’s a more professional slant to an aspect, that may not apply to those of us who are just attempting to sort out our home computer, the text will appear like this.


1. Identify The Problem
Before you can do anything constructive towards solving the problem, first we need to identify what the problem is. Ask questions about what was happening when the worst happened.

  • Were we able to complete the task earlier? If not, perhaps the answer is simply that the computer system’s hardware is not sufficient for the task
  • If the task was possible before, when did we notice the issue starting to develop? If we can work out what happened right before the problem appeared, it might be possible to identify the problem really quickly
  • What types of changes have there been since the last time that particular task was completed? If nothing is immedietly forthcoming, consider whether the computer system has been changed in any way since the last time the failing task was completed. Is there any new software? Have there been any updates to the OS? Has any new hardware been added? Again, this might well lead straight to the source of the issue.
  • Were there any error messages displayed? If we know what the error messages were, it might be possible to perform an internet search of the manufactures website or the internet in general for information

2. Establish a Theory
Quite simply, this is where we check everything that may seem too easy or obvious. Checking such things as that devices are actually plugged in and connected, that power switches are turned on and so-on. It’s important to make no assumptions about these obvious things as, quite often, problems are the result of the simplest things.

Having checked all of the above.

  • If it’s appropriate to do so, attempt to re-create the issue, paying close attention to what takes place and what the results are. If we’re experiencing a fault for the first time while focusing our attentions on the task at hand, rather than what’s going on around that task, we may have missed something vital.
  • If we’re assisting someone else, ask them to recreate the steps they took as exactly as possible. This way, it might be possible to identify an error in the way that they are using an application.
  • At this point, having done all of the above, it’s important to have a theory about what might have occurred. If our own experience falls short here, it might be time to refer to online forums and support websites out there. Whatever the problem is, I’d hazard a guess that others have had the same experience at some time and many will have asked for help online.

3. Test the Theory
At this point we’re now going to test our theory to see if we’re right; check and test related components, inspect connections, check any hardware or software configurations; consult the forums and online support as we mentioned above.

If we manage to confirm our theory but the problem is not yet solved, it’s time to decide what the next steps will be. On the other hand, if we haven’t been able to confirm our theory about what has gone wrong, we either have to look again and see if there’s an alternative theory or possibly consider that something is beyond our ability to fix, without additional resources of some kind.


4. Establish a Plan
Now it’s time for us to establish a plan of action about what we’re going to do to solve the problem. We may need to conduct further research, establish some new or alternative ideas and determine priorities.

We might even end up with more than one plan depending on what the potential causes of our problem are, so we’ll need to prioritize and execute each of these one-by-one.

It’s important to ensure that system downtime is limited and that productivity doesn’t suffer. A half day shutdown of a network, for example, when one machine has had a malware infection probably isn’t necessary and in truth, will likely only cause us more trouble than it will solve.


5. Verify
Once we have resolved the issue, it’s important to ensure that the entire system is functioning as it should be and, if applicable, implement some preventative measures. Preventative measures will include such things as updating system software and firmware or installing antivirus software.

We need to ensure that our solution has actually worked.  And that it hasn’t caused issues with other applications or devices connected to the system.

This part of the process may also include communicating or consulting with customers, colleagues or vendors to communicate the discovered issue, any solutions and any suggested preventative measures.  It might also be a good time to ensure that the customer/client is satisfied with the results.


6. Document
This part of the process very much depends on the nature of how we’re working with a computer system. Whatever the situation, it’s often important to document and share any knowledge gained from the work carried out.

For personal computer issues that we’ve sorted out at home, it may be worth a post in a forum or on a blog like this, if you have one. This is especially true if the cause was perhaps related to some form of malware or virus.

For computing professionals, this could take the form of our company’s documentation plans and for our own reference materials. Often, it’s a good idea to keep notes at each step of the process we’ve taken above while we’re carrying out the tasks.

This enables us to capture each valuable step of the troubleshooting routine, as well as the all important outcome for future use should a similar problem arise again.

Troubleshooting Display Devices

Some common display device problems and possible solutions.

Like all computer hardware, display devices can develop problems and faults. In this article we’re going to look at the more common problems and their possible solutions, starting with the easiest and most obvious.


Dark Screen
A dark screen or unlit power light may indicate that there is a fault to the power supply. This is somewhat fundamental and basic, but I know of more than one person who’s been caught out by it.

  • Check that the power cable is connected to both the display device and wall socket
  • Check that any connected surge protectors haven’t been tripped
  • Check that any circuit breakers haven’t been tripped – If power isn’t getting to any other local devices, then this is a likely cause.

Dim or no Image on Screen
Assuming that the power light of the display device is on, this could be due to an issue with data cables, improperly adjusted settings or the display being in power saving mode.

  • Press the power button to switch the device off, and then switch it on again (the famous “try and restart it” method).
  • Ensure that the data cable is correctly connected to both the display device and the input device.
  • Unless the display is particularly old, you should see an On Screen Display (OSD) message when power is present but no cable connected. In this case, a signal problem is most likely the issue.
  • If no OSD appears when a cable is disconnected then the display itself is likely faulty.
  • If an OSD does appear when the cable is disconnected and the device still fails to show any images, check the brightness and contrast settings. OSDs are not affected by these settings, so it would still appear.
A television OSD – In this example showing the channel and volume

Flickering or Distortion on CRT Devices
Flickering on a CRT (Cathode Ray Tube) type device is most often caused by a disruption to the signal being sent to the monitor.

  • Check the security of the connections between the device sending data to the display device and the device itself. It may need to be adjusted so that it is more securely connected to the video port, or there may be broken or bent pins. Attempt to straighten any bent pins and, in the even that any are broken, replace the cable itself.
  • An incorrect display adapter or adapter drivers may also cause this problem. If the POST (Power-on Self Test) is visible, but then the screen goes black once the system has started, it’s worth attempting to boot the device in VGA mode (‘VGA mode is a legacy mode with minimal video drivers and a screen resolution of only 640 x 480) and to verify that the correct adapter and drivers are being used.
  • The refresh rate may not be set correctly. The rate should normally be set as high as the adapter and device are able to support but, if set too high, it’s possible that this may have damaged the device.
  • Check the proximity to other devices of a similar nature. If a CRT display device is too close to another, then interference may become apparent. Continued interference of this nature may cause damage.
  • Check the colour depth settings on the display device. Incorrect settings may cause unusual effects on the display device.

The Display Switches Itself Off
This is normally caused by interruptions to the power supply of the display device from within the computer system itself.

  • Power Management Settings. These can be altered by going into the CMOS (Complimentary Metal Oxide Semiconductor) settings or in the display settings of the computer’s operating system.
  • The display’s video card is shutting down due to overheating. The only real solution here is to replace the video card or install additional cooling fans into the computer system.
An example CMOS/BIOS Screen

Application Problems
if a display device behaves in an erratic fashion, flickering or going blank from time to time when a specific application is running, it’s possible that the application requires an alternative resolution or colour depth. Right click on an area of the screen that doesn’t contain an application and select ‘screen resolution’ to change the settings.


Defective Pixels
Pixels that make up an LCD display device output will sometimes not display as they should. Generally speaking, there are two types of issues that pixels can fall foul to:

  • Dead Pixels are pixels that don’t display the output ligfht as expected. This is obvious when the LCD is displaying an image and there are black spots visible, containing no light.
  • Stuck Pixels are pixels that only show light so they are noticeable and out of place when the LCD is displaying an image. These lights can show as red, green or blue.

Repairing pixels that have become defective can be rather difficult to accomplish. In this case, the first port of call is to contact the manufacturer to check for warranty information. If the monitor is older and therefore out of warranty, it might be possible to fix the pixels by trying the following:

  • Use a blunt object to apply pressure to the screen in the area of the dead/stuck pixels.
  • Use heat, applied to the area of the defective pixels. In this case, we’re talking only about a hot, wet cloth that’s placed in a plastic bag and then applied to the defective area of the screen.
  • Use a defective pixel software utility. Such examples are: JScreen Fix, Dead Pixel Tester 3 and PixelRepairer.

Colour Issues
If the colour of a display device appears to be presenting incorrectly, the most likely cause is that the settings for the device are wrong. Simply adjust the settings to adjust the screen’s colours.

In the case of CRT displays, it’s possible that the device will need degaussing.


Physical Damage
This is something of a non-starter really. If there is visible physical damage to a display device, the most likely outcome is that it will need to be replaced. Cost and time considerations often mean that repair is not worthwhile.


Distorted Geometry
There are generally two causes for a display device to develop distorted geometry.

  • Running a monitor at a resolution that is not within it’s memory. This is easily fixed by using the standard monitor controls or adjusting the resolution via the computers operating system.
  • Magnetic interference. As mentioned in an earlier section of this post, attempt to move the device away from any possible causes of magentic interference. Again, over time, this form of interference is likely to cause damage over time.

Burn In
Image persistence (also known as ‘burn-in’) can happen with any type of display device. Burn-in is more prevalent on CRT and plasma displays than on LCD and is more likely to be prevented on LCD screens through the use of screensavers.


Oversized Images and/or Icons
Ordinarily, this is simply caused by the incorrect resolution being transmitted to the display device from the computer system. To correct, simply go into the display settings on the computer and adjust accordingly.


Video Card Issues
With video cards, there are some specific problems that can lead to, equally specific, symptoms.

  • If the computer will only boot into VGA mode, it’s very possible that the video card drivers are either missing or corrupted.
  • Visual anomalies or errors in the visual display of an image, known as ‘visual artifacts’
  • A Windows stop error, also known as the ‘Blue Screen Of Death’ or BSOD’ can be an indicator that there are issues with an installed graphics card.
  • Curves, waves, patterns or distortions in the video image.
NVidea GEForce 7800 Graphics Card

Here’s some additional troubleshooting steps to take in the event of video card issues:

  • Ensure that the graphics card is installed and seated correctly on the computer motherboard.
  • Ensure that the latest drivers for the installed graphics card and chipsets on the motherboard.
  • Check for any possible interference with other devices that are in close proximity. Try removing any devices that you suspect may be causing an issue.
  • Ensure the system is not being ‘overclocked’ beyond the capabilities of the installed graphics card.
  • Check physical items such as power cable connections and that all cooling fans are operating correctly.

Study Reference Disclaimer

Password Psychology

A lttle explanation around the reasons for our password choices

We’re sitting there, in front of the computer and in the middle of signing up for a shiny new account on some website or another and the usual sorts of questions are there:

What’s Your Name?

Yup, I know that one..  No problem.”

What’s Your E-mail address? 

“Damn, was it dot-com or dot-net?  Ahh, here we are; dot-net.  Sorted.”

What Password Are You Going To Choose? 

“Ummm..  Errr.. Hmmmm.. What can the hell can I use for a password?”

And here’s our first problem.  Unless we’ve given it some thought before we’ve gone to whatever-we’re-signing-up-for.com and started filling everything in, we’re under pressure.  We need to come up with an answer to that fateful question and most of us feel the need to do it fairly quickly.  Anxiety starts to set in (for the average computer user, it really does), or we’ve got to go and feed the cat, pick the kids up from school or simply want get the order done because ‘it’s just so shiny’.

So our thought process leads us to think of things based on two different but related themes.

  • Familiarity:  We’ll think of things that are familiar to and have meaning for us, normally something that has lasted the test of time.  Alternatively, it could be something that’s still in our short term memory.  Perhaps that film we saw last night or the brand new Ford Mustang we saw this morning while filling up with fuel. All these sorts of things will pass through as we’re considering the options.
  • Memorisation:  The majority of us, whilst considering such things as the new Mustang this morning, will disregard those as options relatively quickly.   This is because we’re less likely to remember them over time than things that have a lasting meaning for us. Obviously, our being able to remember the passwords we choose is vital, otherwise we’re soon going to find ourselves unable to access whatever we’re signing up for.

Generally speaking, a very high percentage of our passwords are chosen through impromptu generation, based on that familiarity and memorisation. Looking a little deeper though, we’re able to break things down some more.

Based on a study carried out in 2002 by a British Psychologist, Dr. Helen Petrie, Ph. D, our familiarity/memorisation choices are centered in one of four genre subsets:

  • Family-orientated (almost half of those surveyed)
  • Fan-based (approximately one-third of those surveyed)
  • Fantasists (approximately eleven percent of those surveyed)
  • Cryptics (approximately ten percent of those surveyed)

Family-orientated password creators will generally choose names, nicknames, birthdates, places or other things that they have strong emotional or family ties with.  This subset of people tend to fit into the bracket of ‘occasional computer users’, often having fewer online accounts than the average.

Fan-based password creators will generally focus their attentions onto things that they really like.  Such as films, tv, music, games and so on.  Two of the top choices in this genre from those who were surveyed were Homer Simpson and Madonna.  In 2016, one of the top most common passwords was ‘StarWars’, following the release of Episode VII in 2015.  For this reason, this subset of people may have some of the easiest passwords to crack, their commonality and general public presence causing these words to hit most hackers lists.

Fantasists tend to be slightly narcissistic in their choice of passwords and will often focus their choices around terms of self admiration, whether knowingly or not.  Whilst the majority of those surveyed who fell into this genre were male, a surprising thirty seven percent were female.  Fantasists often have a sexual focus in their passwords, choosing words such as ‘sexy’ or ‘goddess’.  If you’ve taken a look at the 100 of The Most Common Passwords, you’ll maybe have seen that there are a number of similarly related words in there.

Cryptics are the most cyber-security conscious of us all.  Their passwords are often made up of meaningless and unintelligible strings of numbers and letters (e.g. jft922+x).  Whilst they certainly have the most secure passwords, they are also the least interesting.


Type ‘A’ or Type ‘B’ Personality?

One of the other things that affects the choices that we make in regards to passwords is our general personality type.  This is somewhat more vague than the findings of the above study, but does still hold considerable relevance in defining the words or phrases that we use.

Type ‘A’

Those of us that fall under the Type ‘A’ personality type tend to derive our passwords from a desire to be ‘in control’.  We have a tendency to believe that our accounts are not at risk and will often reuse passwords across different logins.  Some of this tendency is based around us wanting to ensure that we don’t forget the passwords we use.

Additionally, those of us who fall into this personality trait are often quite focused on details and will have a methodology around how we remember the passwords we use.  60-70% of us Type ‘A’s are normally quite proactive about trying to keep our online selves secure, even if our efforts might be a little misguided at times.

Type ‘B’

On the other hand, those of us who lean more towards the Type ‘B’ personality are more inclined to believe that our accounts are not at risk, mainly because they aren’t worthy of a hackers time.  This has a tendency to reinforce any bad habits we’ve got into around our password choices and, eventually, to make us believe that those bad habits are acceptable.

In fact, 40-50% of us Type ‘B’s are under the impression that we have nothing of value enough to a hacker for us to be targeted and will primarily choose a password based on how easy it is to remember.


Whilst password psychology does give us some indications as to why we choose the passwords we do, it’s not enough to be accepting of those reasons.  In order to keep ourselves, and those connected to us, safe from the attempts of hackers, we need to rethink and improve how we approach our password choices.

Rikoooo Simulation

A comprehensive FS freeware site with installers and forums

www.rikoooo.com

Rikoooo hosts a huge number of freeware items for FS2004, FSX and P3D and from what I’ve seen so far, all of the items appear to be high quality builds. All of the content comes bundled within simple installers, so it’s easy to get any downloads into your sim fairly quickly.

rikoooo_home

Rikoooo do have download speed limitations for unregistered members, but to date I’ve not found that to be much of an inconvenience as most file sizes appear to be of a reasonable size (>60Mb)

Lastly, for those to like to chat, ask questions and provide answers, Rikoooo has it’s own forums for that very purpose.


GIMP

An open source and feature rich graphical editing package

www.gimp.org

“GIMP is an acronym for GNU Image Manipulation Program. It is a freely distributed program for such tasks as photo retouching, image composition and image authoring.”

Source: GIMP.org

This is a great piece of image editing software that I’ve been using for years and has become a vital piece of my software armoury.  With a feature set not unlike Adobe Photoshop (although Photoshop is more able in some respects), GIMP has the major advantage of being Open Source.

This not only means that it’s entirely free (and will always be) but that it also receives regular updates to provide new features and tweaks.

Snappy Goat

A resource of almost 14 million royalty free stock images

www.snappygoat.com

Snappy Goat is a stock photo website with almost 14 million images available to download and use under the CC0 Creative Commons Licence

No attribution to the creators is required under the licence and images can even be used for commercial purposes.

If you’re a digital creator, web designer or graphics editor then this could well be a very useful resource for you.

Pixabay

A resource of over 920,000 royalty free stock images, vectors and illustrations

www.pixabay.com

Pixabay is a website with over 900,000 royalty free images available to use for any purpose under the CC0 Creative Commons licence.

easter-eggs-2168521_640

No attribution to the creators is required under the licence and images can even be used for commercial purposes.

If you’re a digital creator, web designer or graphics editor then this could well be a very useful resource for you.